While moving a customer from On-Premises to Oracle Cloud Infrastructure, we recently conducted some performance testing before the final cutover. For the E-Business Suite database server, a physical box with 16 CPU cores was migrated to a VMStandard E3.Flex VM with 12 OCPU. From a CPU performance perspective, the new VM was much faster than the old box. Unfortunately, this was not the case on the I/O performance side. The first blog post (part 1) contains some general information about I/O performance in the Oracle Cloud Infrastructure.
In this part we'll see how we can migrate an E-Business Suite on an OCI database instance to Automatic Storage Management (ASM) and what impact this has from a performance perspective.
Oracle Automatic Storage Management (ASM)
Oracle ASM is the Oracle recommended storage management solution that provides an alternative to conventional volume managers, file systems, and raw devices.
Oracle ASM is a volume manager and a file system for Oracle Database files that supports single instance configurations of Oracle databases and Oracle Real Application Clusters (Oracle RAC).
Oracle ASM uses disk groups to store data files. An Oracle ASM disk group is a collection of disks that Oracle ASM manages as a single unit. Within a disk group, Oracle ASM provides a file system interface for Oracle Database files. The contents of files stored in a disk group are evenly distributed to eliminate hotspots and to maintain uniform performance across the disks. The performance is comparable to the performance of raw devices. See the documentation for more details.
Installing ASM on an E-Business Suite instance provisioned through Cloud Manager
Unfortunately, E-Business Suite instances deployed through Oracle Cloud Manager (whether for new installations or when restoring a backup) "on Compute" do not leverage ASM for storing Database content. Fortunately, this can be changed with the following sequence of steps outlined below:
- In the Oracle Cloud Infrastructure Console create 7 new Block Volumes (asm1-asm7) with 500 GB each and attach them to the database compute instance.
- Execute the iscsi-attach commands displayed in OCI console for each of the volumes (and make them available in the linux vm).
- Configure asmlib
yum install oracleasm-support kmod-oracleasm
groupadd -g 54327 asmdba
groupadd -g 54328 asmoper
groupadd -g 54329 asmadmin
useradd -u 54331 -g oinstall -G dba,asmdba,asmoper,asmadmin grid
oracleasm configure -I (accept defaults)
oracleasm init
oracleasm createdisk DATA1 /dev/sdc1
oracleasm createdisk DATA2 /dev/sdd1
oracleasm createdisk DATA3 /dev/sde1
oracleasm createdisk DATA4 /dev/sdf1
oracleasm createdisk DATA5 /dev/sdg1
oracleasm createdisk DATA6 /dev/sdh1
oracleasm createdisk DATA7 /dev/sdi1
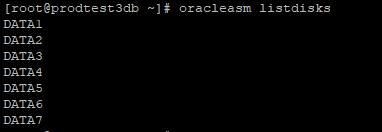
- Verify using oracleasm listdisks that 7 Disks are now managed by asm:

- Make sure to modify the system.d unit for oracleasm to startup only after iscsid has been loaded.
- Give appropriate file-limits to the "grid" user and grant it access to ORACLE_BASE:
chmod g+w /u01/install/APPS/admin/ - Install the Clusterware as the "grid" user using runInstaller
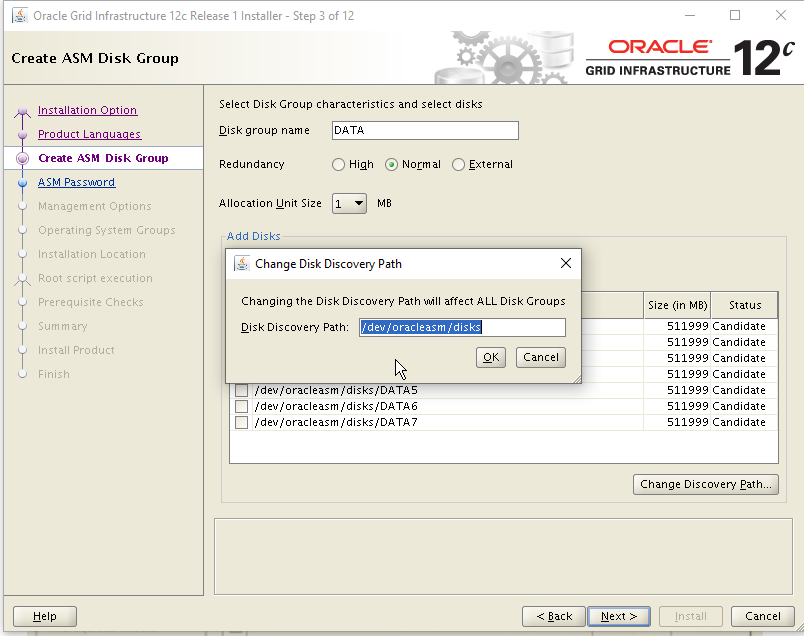
- Create a datagroup +DATA out of the 7 disks created. Use "external redundancy" since data is already redundant on the OCI Block Storage level.

- Patch Clusterware to the latest DBBP.
- Verify using asmcmd that the +DATA disk group is working as expected.
Moving data to ASM
After the installation of Clusterware and configuration of an ASM diskgroup +DATA, all data that was previously on a local EXT3 partition must be moved to ASM. The steps to be performed are well explained in the oracle documentation. On a high level:
- Create an spfile backup
- Use RMAN to create a "BACKUP as COPY" to ASM
- Shut down the database
- Bring it up while configuring control-file and db_create_file_dest to +DATA
- Restore the control files to ASM
- Switch database to copy using RMAN
- Recover and Open the database
- Replace temporary tablespace files and redo logs with new files on ASM
Performance
The Measuring Performance gives us an I/O-Performance, which is by factor 6.5 (from the theoretical maximum of 7) higher than the performance with a single drive. The throughput is slightly more than factor 3 higher than with a single drive:
Max IOPS = 161.620
Max MBPS = 1.412
This worse than expected increase in throughput is due to the fact that we have hit the networking speed of our 12 OCPU VM: With "only" 12 GBps of network bandwidth we can reach no more than appx. 1400 MByte per second.
Summary
Using ASM provides a convenient and reliable way to store the contents of an Oracle Database. In the Oracle Cloud Infrastructure, this allows using more than a single block volume to store data easily.
By automatically distributing data across multiple volumes, you can achieve much better I/O performance than using a single block volume as provided by Oracle "out of the box". For a database with several terabytes of storage, this means a massive performance improvement without additional OCI costs.
There are only three major drawbacks of this approach:
- Unfortunately, it is not yet possible to perform a fast-clone using E-Business Suite Cloud manager. It is also unlikely to be "on the roadmap", as Oracle would suggest using the Database Cloud Service (BYOL) as backend for the E-Business Suite in such cases.
- Clusterware installation containing ASM is something that needs to be maintained in addition to the database home. Furthermore, "traditional DBAs" tend to prefer "dbf-files" over ASM.
- It is possible to create a backup and restore this backup (e.g. for the cloning production to be tested) with Cloud Manager tools. However, the target will not have ASM as a storage option. As a result, the test environment will differ from the production environment.
In the third part of this series we will see how the Linux Volume Manager can serve as a lightweight alternative to ASM.


