The Oracle E-Business Suite Cloud Manager provides only very basic management and no monitoring functions for E-Business Suite environments: essentially for creating, restoring, deleting and backing up the environment. The underlying hosts (including storage and network) can also be conveniently monitored with the OCI console. However, when it comes to the application (and especially database) itself, these tools do not really help. This is where Oracle Cloud Control comes into play - as it was on premise as well. This article describes how easy it is to setup a Cloud Control environment on OCI and to connect all E-Business Suite Apps- and DB-Tiers to it.
Setting up a Cloud Control 13.3 Environment on OCI
Oracle provides a pre-built image on the cloud marketplace for the basic setup of a Cloud Control environment. The procedure for creating a Cloud Control installation based on this is described over there:
https://docs.oracle.com/en/enterprise-manager/cloud-control/enterprise-manager-cloud-control/13.3.1/emoci/index.html
It is important to give the appropriate privileges to the Virtual Machine to attach a volume as described in the Oracle documentation. Furthermore it is necessary to open the requested ports; especially if the Cloud Control resides in a separate subnet from the E-Business Suite Database or Apps-Hosts. In addition to the ports listed, the Cloud Control machine needs to be able to access port 3872 of all managed instances.
Discovering EBS@OCI Hosts
Creating Named Credentials
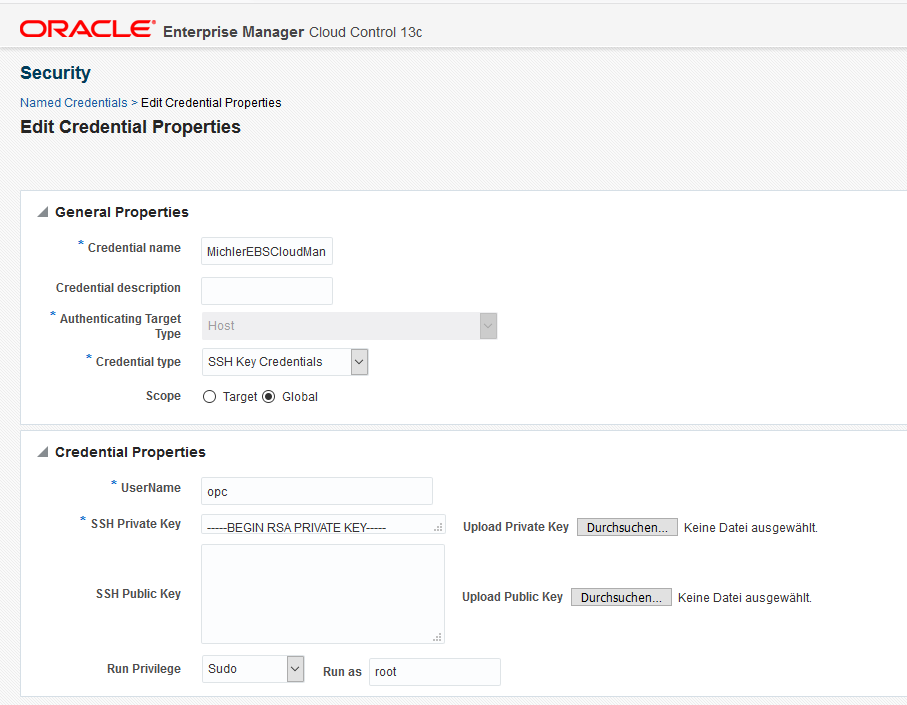
The easiest way to later install the Agent, which is required on every host managed by Cloud Control, is by creating named credentials with a private ssh key that is able to connect as "opc" (and thus as root or oracle). You can use the key that is used by the E-Business Suite Cloud Manager (located within the oracle user) for this purpose:

Create a preinstall script
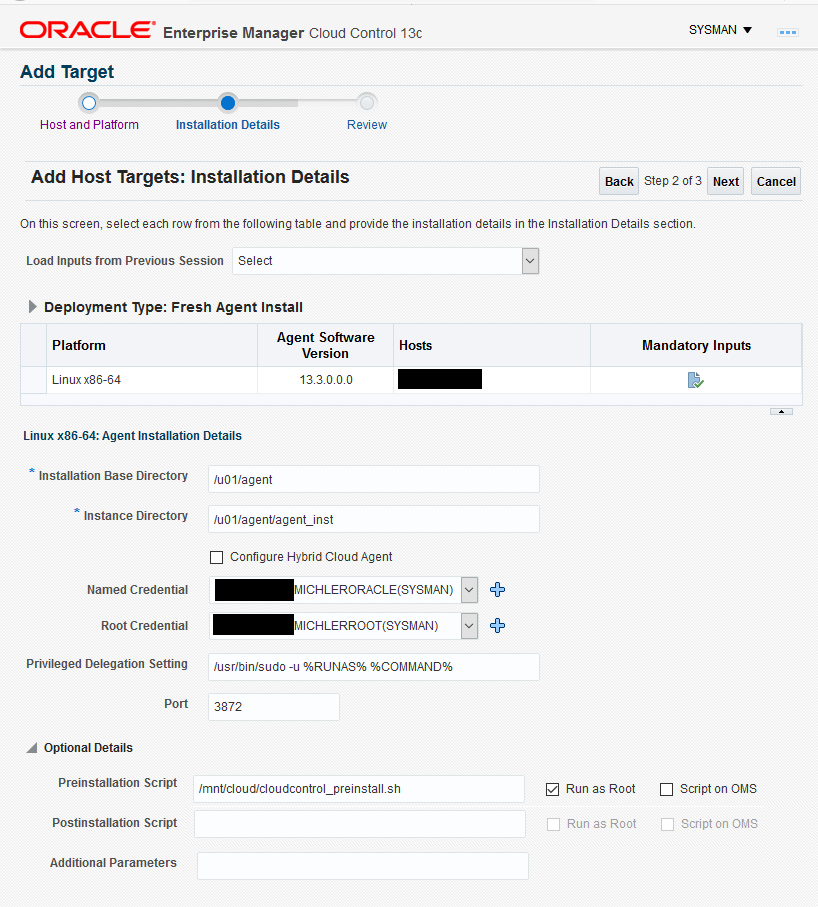
In case you need to deploy the agent to many machines, it could be useful to put a little script on a network share that can be accessed from all instances (I put it to /mnt/cloud/cloudcontrol_preinstall.sh and gave it 775 privs):
echo \"10.1.15.20 emcc.marketplace.com\" >> /etc/hosts
firewall-cmd --permanent --add-port=3872/tcp
firewall-cmd --reload
When lacking an appropriate location or when the installation is required only on a limited number of machines, the 3 commands can obviously also be run manually.
Remote-Install Agent
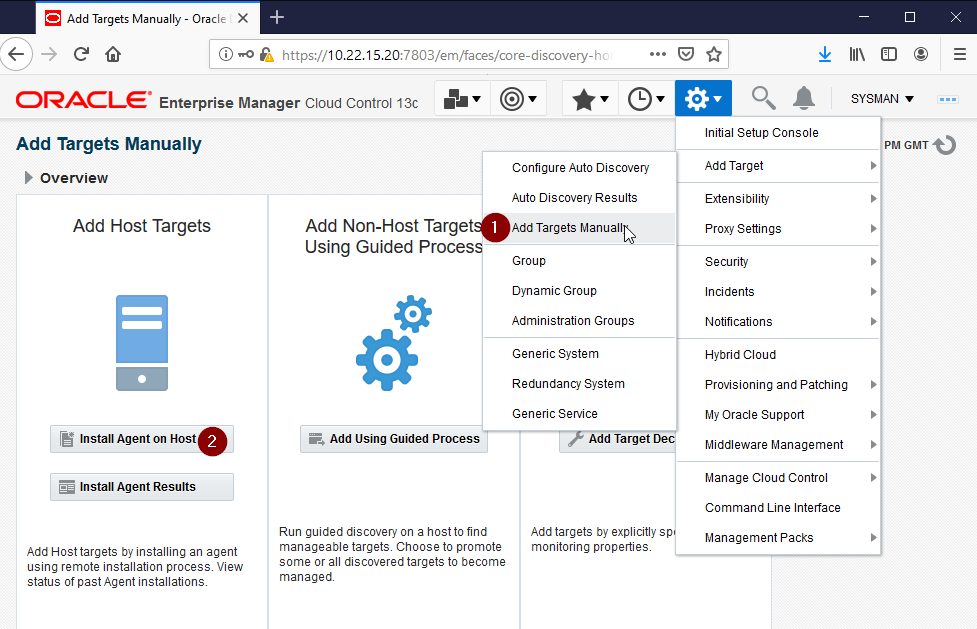
With this preparations done, the agent itself can be installed. The following describes this for a limited list of (fixed) IPs, but you can of course also scan your entire Apps- and DB-network:

Then specify the hosts and the following parameters:

Discover the database
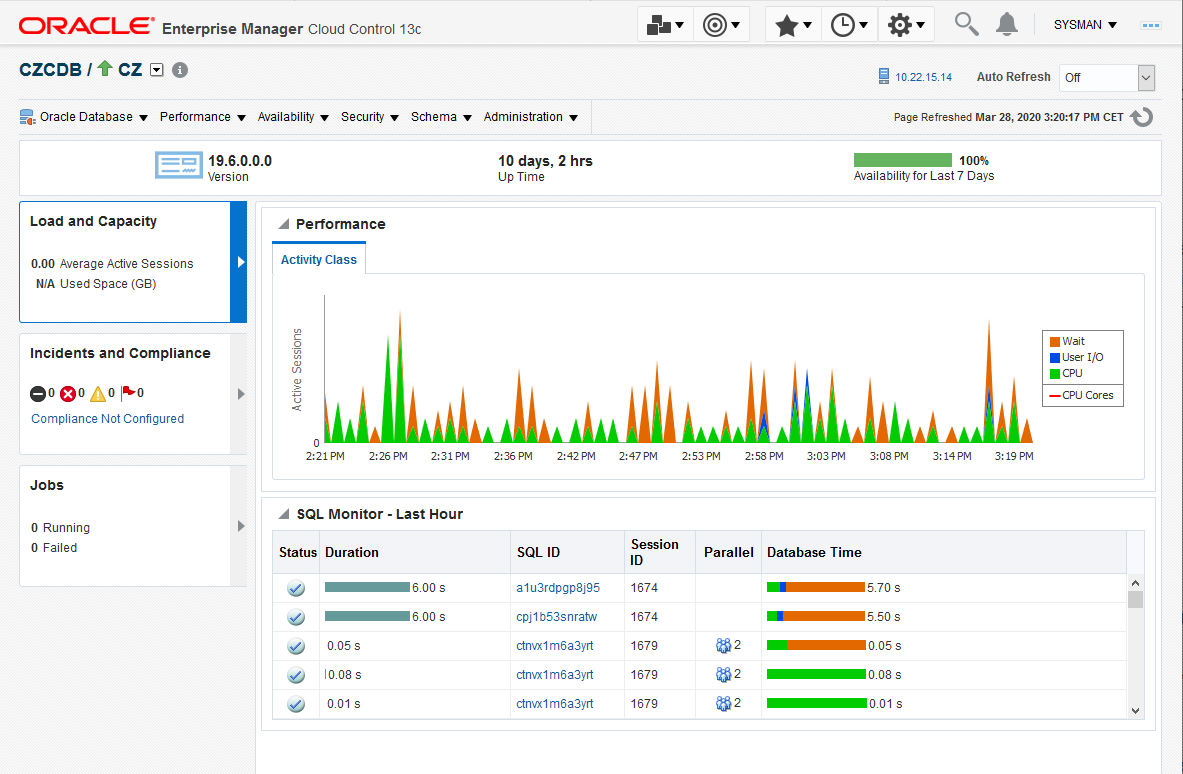
The installation of the agents takes some times. Afterwards automatic "Target discovery" should list all the apps-tier and database oracle homes and instances and allow convenient management:

On a side note: This is an Oracle 19c Database (with CDB/PDB) instance. This version will only be supported by E-Business Suite Cloud Manager when the next version will be made available (hopefully very soon). From a Cloud Control perspective though, this is already supported.
When having licensed Application Management Pack for E-Business Suite, the steps in Getting Started with Oracle Application Management Pack (AMP) for Oracle E-Business Suite, Release 13.1.1.1.0 (Doc ID 2045552.1) should of course also be carried out.
Summary
It is really easy and convenient to setup a Cloud Control instance on OCI and register the E-Business Suite targets. The Cloud Control also allows interaction with OCI directly, but this is for a separate blog post to cover (hopefully soon).


