
I recently set up a new “E-Business Suite on OCI” environment for a customer. During the initial setup, the customer was not able to set up a Site-2-Site Tunnel between their on premise Data Center and the Oracle Cloud Infrastructure Data Center in Frankfurt. To make my initial setup and testing more convenient, I decided to set up a separate VPN tunnel to my own development network. This was easily done with a Rasperry Pi, as described in a previous blog post. Since my Home Router AVM Fritz!Box (7490 in my case) is able to establish an IPSEC VPN tunnel as well. I wanted to try this device out too, so let’s see how this worked.
Oracle Documentation and my Network Setup
There are some pointers to Oracle Documentation in my previous blog post.
Basically I’m running a Fritz!Box router connecting my private network 192.168.2.0/24 to the internet. Currently the Fritz!Box has a public IP address of 2.205.236.176. It is important to mention that Oracle currently only supports static IP addresses.
Setup in OCI
I assume that there is already a Virtual Cloud Network in OCI, e.g. created through terraform automation, as described here.
First of all, create a Customer-Premises Equipment on OCI:
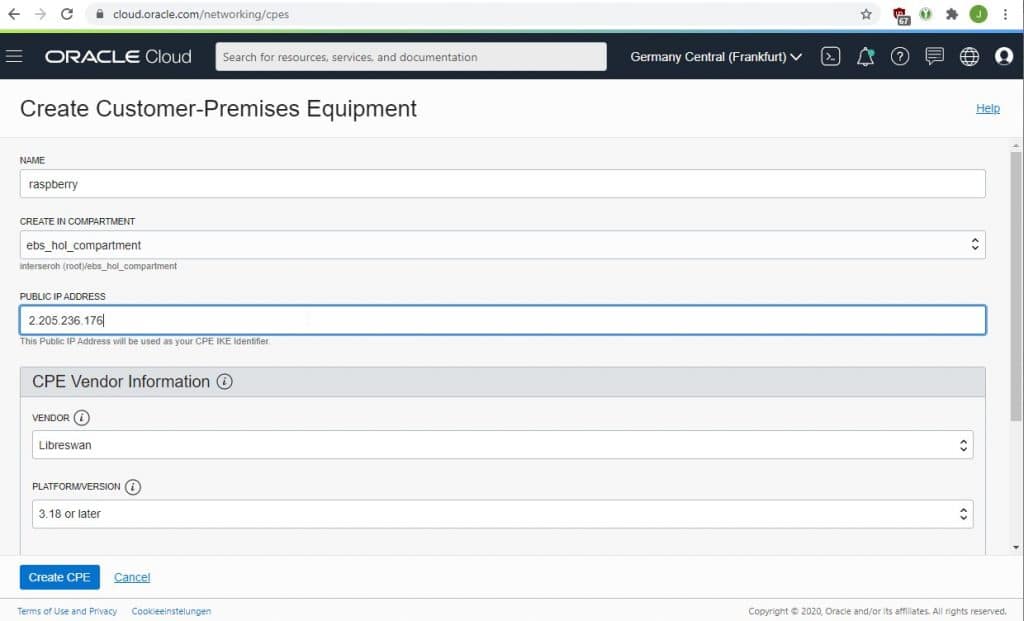
You need to provide the public IP address on that screen.
Furthermore, you need to create a Dynamic Routing Gateway (DRG) and attach it to your VCN.
Finally, create a VPN Connection in OCI:
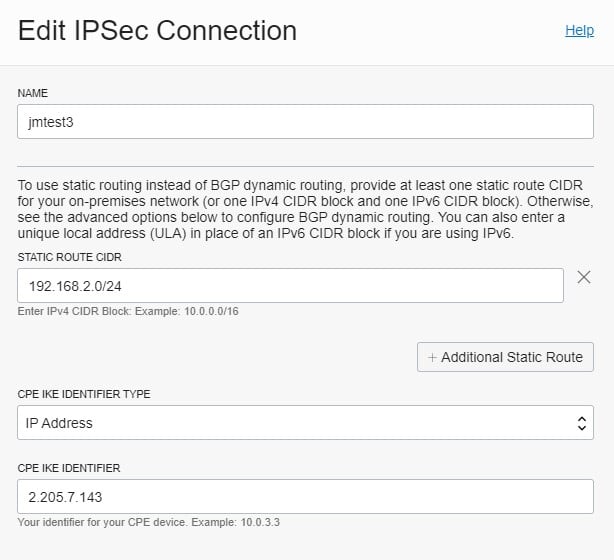
Furthermore select your Dynamic Routing Gateway and a static routing of 192.168.2.0/24.
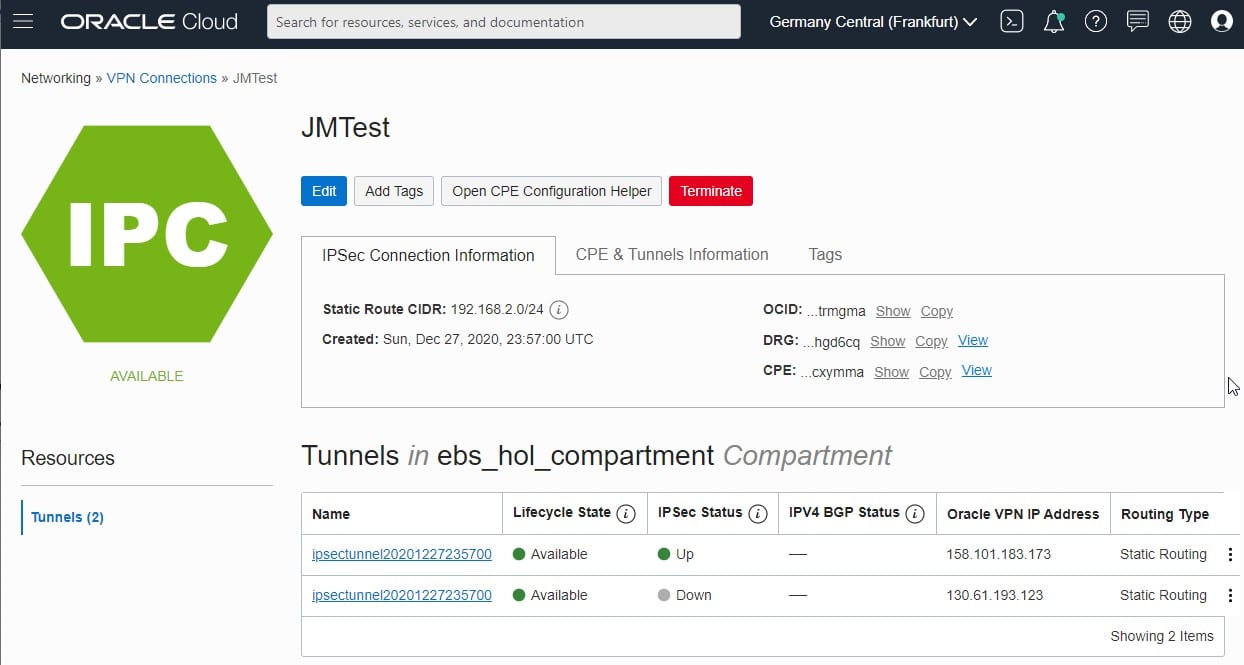
After finishing you get two public IP addresses from Oracle as well as a PSK for each of the tunnel endpoints:
Preparation of a config file
Unfortunately there seems to be no official documentation about the exact syntax of the Fritz!Box regarding IPSEC VPN. However, the following links helped me:
http://www.burth-online.de/cms/index.php/technik/fritzbox/49-vpn-konfigurationsdatei.html
https://www.linogate.de/support/categories/ipsec/fritzbox.html
With a text-editor create a vpnconfig.txt file as follows:
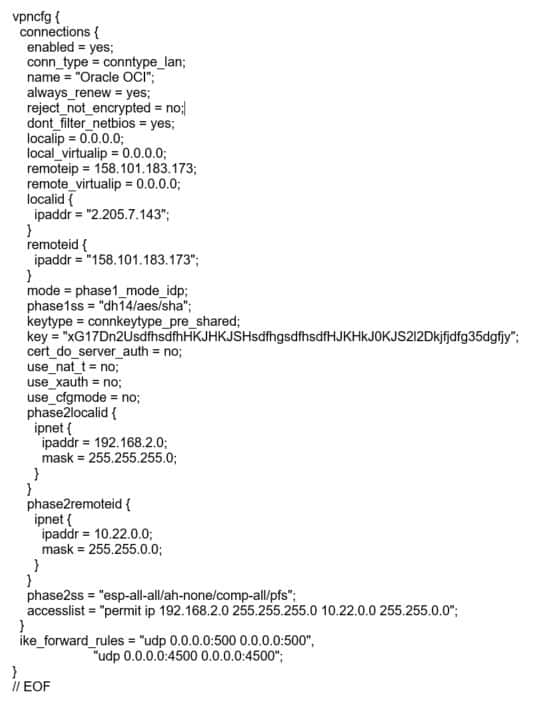
Of course, you need to replace:
- the “key” with the PSK of the OCI VPN Connection
- 158.101.183.173 with the OCI VPN IP Address
- 192.168.2.0 with your own local network segment
- 10.22.0.0 with your OCI VCN network
Configure Fritz!Box
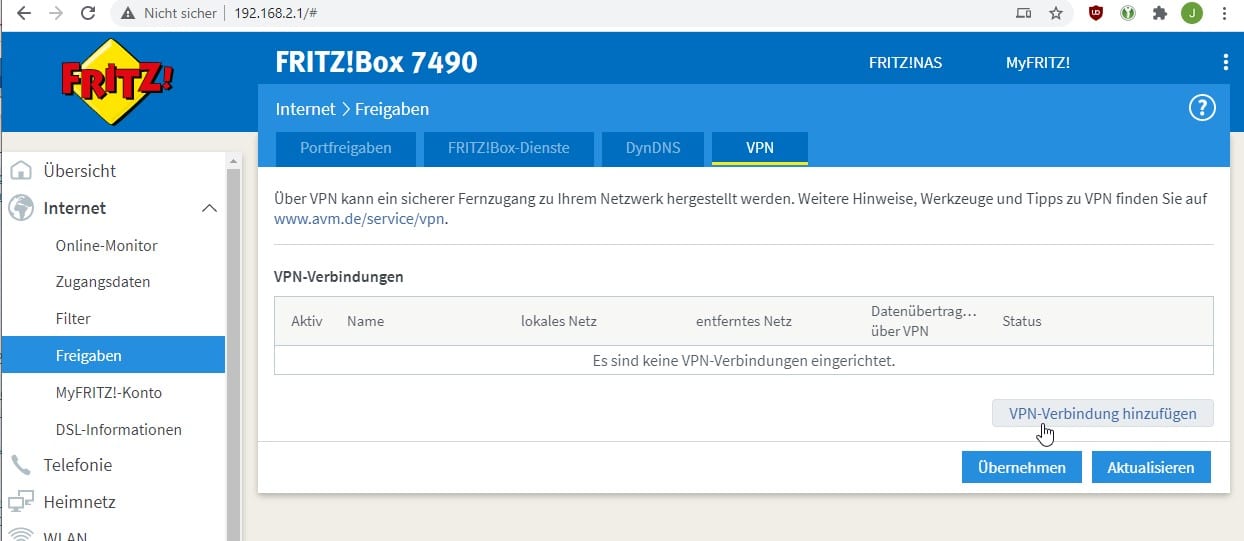
Finally, navigate to the VPN section of your Fritz!Box and load the config file created before:
Verify
If everything goes well, both the Fritz!Box and the OCI Console should display the VPN Tunnel as “up”. If you have suitable Routing Rules on the OCI side to send 192.168.2.0/24 to the Dynamic Routing Gateway and there are no firewall rules “in the way”, you should be able to issue a ping in both directions or establish a SSH connection:


