To make my initial setup and testing more convenient, I decided to set up a separate VPN tunnel to my own development network. I first tried libreswan on a Raspberry Pi. The following blog post shows the (surprisingly simple) basic setup.
Oracle Documentation and my Network Setup
There is a pretty good documentation of the procedure over there: https://docs.oracle.com/en-us/iaas/Content/Network/Reference/libreswanCPE.htm
This serves as a good starting point, however some parts of this documentation – especially regarding NAT – is a bit confusing. Let’s see which steps have to be taken.
Basically I am running a Fritz!Box router connecting my private network 192.168.2.0/24 to the internet. Currently the Fritz!Box has a public IP address of 2.205.236.176.
Setup in OCI
I assume that there is already a Virtual Cloud Network in OCI, e.g. created through terraform automation, as described at https://www.promatis.de/2020/07/09/quickstart-to-running-e-business-suite-on-oci-with-terraform/
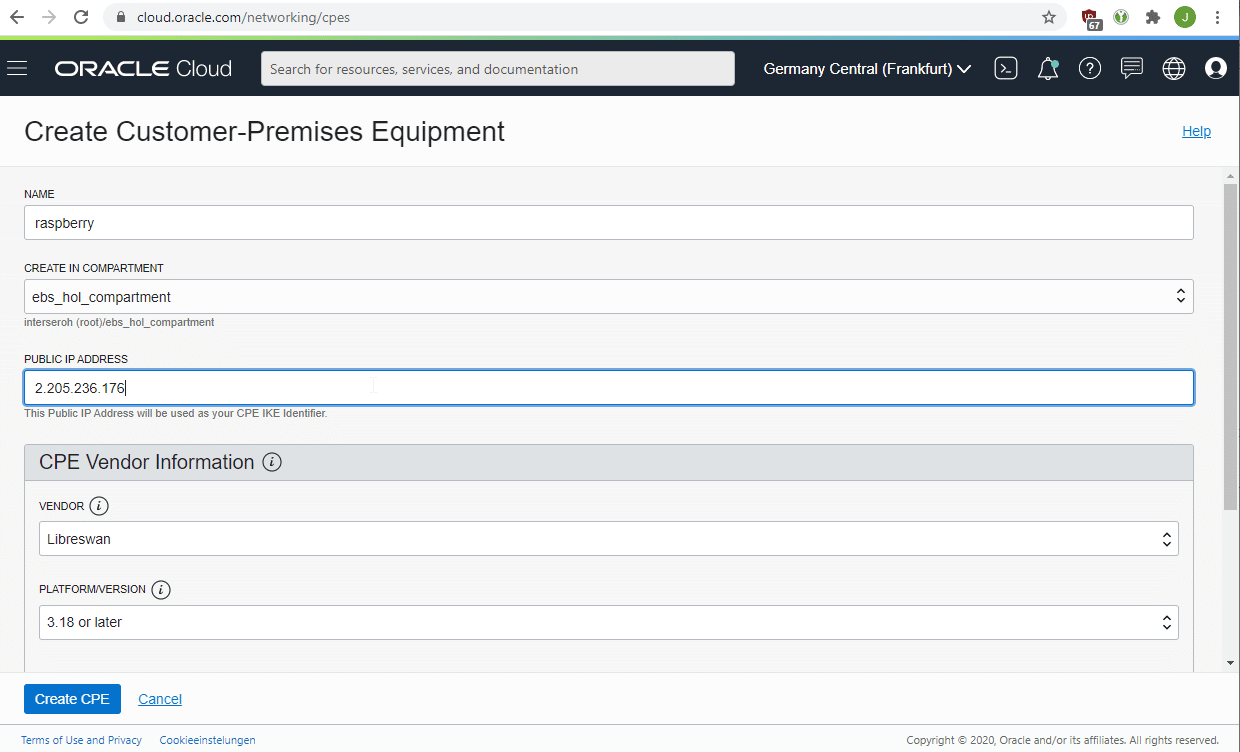
First of all, create a Customer-Premises Equipment on OCI:

You need to provide the public IP address on that screen.
Furthermore, you need to create a Dynamic Routing Gateway (DRG) and attach it to your VCN.
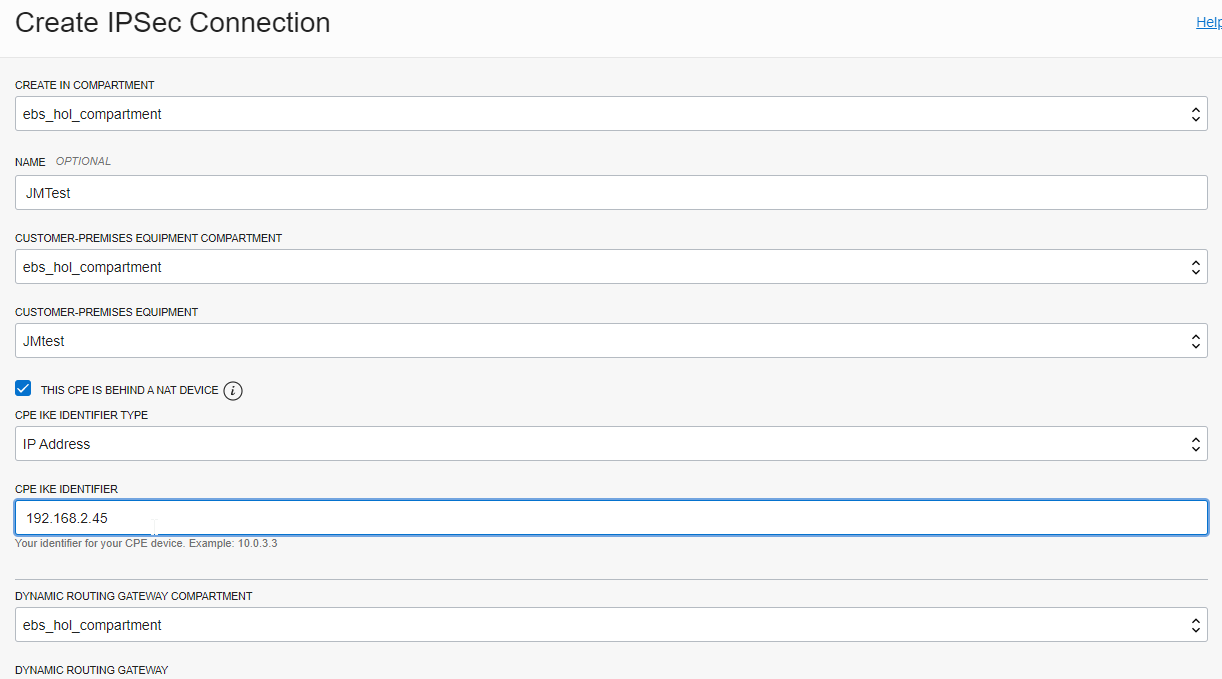
Finally, create a VPN Connection in OCI:

Here you need to activate the checkbox “This CPE is behind a NAT device” and enter the private IP address of the Raspberry Pi as the CPE IKE Identifier.
In addition, select your Dynamic Routing Gateway and a static routing of 192.168.2.0/24.
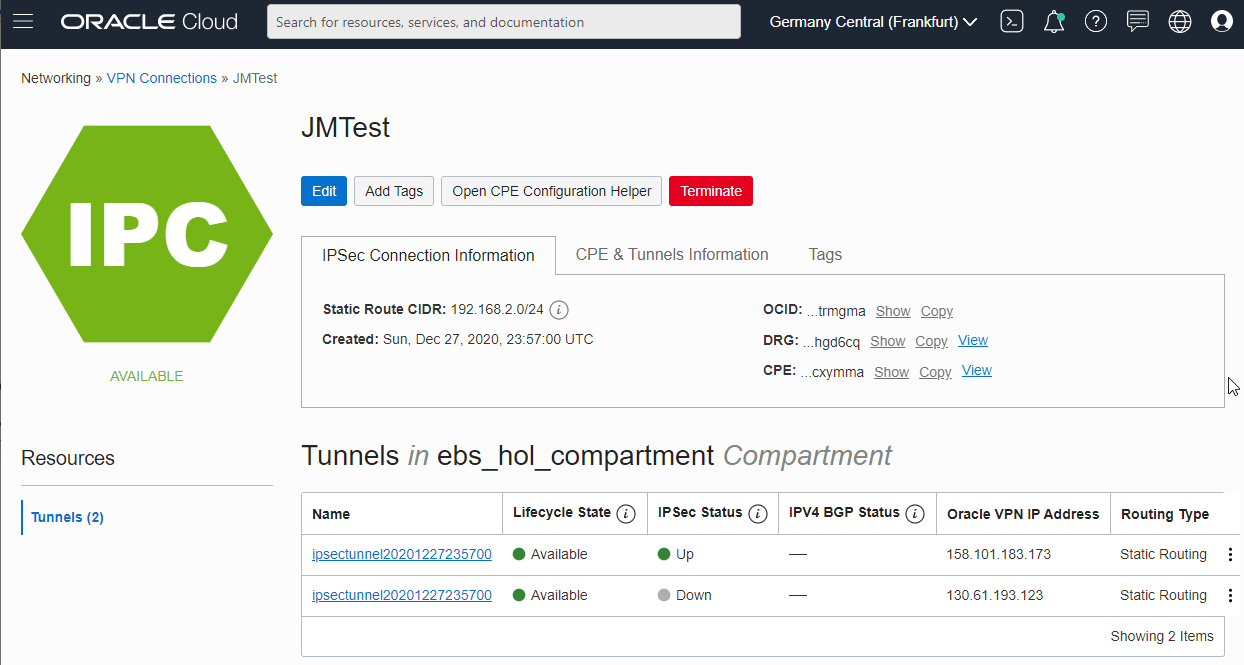
After finishing, you receive two public IP addresses from Oracle as well as a PSK for each of the tunnel endpoints:

Setup on the Raspberry
The setup on the Raspberry Pi is almost 100% as described in the Oracle documentation (do everything as the “root” user):
1. Install libreswan by issuing “apt-get install libreswan”
2. Edit /etc/sysctl.conf and add the following:
net.ipv4.ip_forward=1
net.ipv4.conf.all.accept_redirects = 0
net.ipv4.conf.all.send_redirects = 0
net.ipv4.conf.default.send_redirects = 0
net.ipv4.conf.eth0.send_redirects = 0
net.ipv4.conf.default.accept_redirects = 0
net.ipv4.conf.eth0.accept_redirects = 0
3. Apply the change with sysctl -p.
4. Create /etc/ipsec.d/oci-ipsec.conf as follows (note the indentation):

5. Create /etc/ipsec.d/oci-ipsec.secrets as follows (all in one line):
192.168.2.45 158.101.183.173: PSK “xG17Dn2UsdfhsdfhHKJHKJSHsdfhgsdfhsdfHJKHkJ0KJS2l2Dkjfjdfg35dgfjy”
6. Restart ipsec using systemctl restart ipsec
7. Check the log files with journalctl | grep pluto. This should give something similar to:
Dec 28 14:33:12 raspberrypi pluto[1779]: “oracle-tunnel-1” #1: STATE_MAIN_I4: ISAKMP SA established {auth=PRESHARED_KEY cipher=AES_CBC_256 integ=HMAC_SHA2_384 group=MODP1536}
8. Issue “ip link show” to verify the tunnel is up:
10: vti1@NONE: <POINTOPOINT,NOARP,UP,LOWER_UP> mtu 1480 qdisc noqueue state UNKNOWN mode DEFAULT group default qlen 1000
link/ipip 192.168.2.45 peer 158.101.183.173
9. Add routing on the Raspberry Pi side:
ip route add 10.22.0.0/16 nexthop dev vti1
Verify
The VPN Tunnel should be displayed as “up” in the OCI Console. If you have suitable Routing Rules on the OCI side to send 192.168.2.0/24 to the Dynamic Routing Gateway and there are also no firewall rules “in the way”, you should be able to issue a ping in both directions or establish a SSH connection:


