
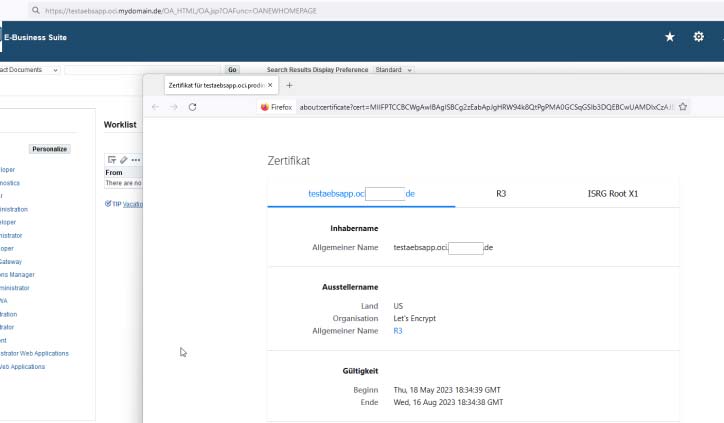
E-Business Suite Umgebung mit LetsEncrypt Zertifikat
Nowadays, all web traffic through the internet should be encrypted. For this to work, SSL certificates are required. These can be bought from commercial Certificate Authorities. Since around 2016, certificates are also provided for free by the nonprofit Certificate Authority Let's Encrypt. There are various tools to create these certificates, also with Oracle OCI, however, they usually require dedicated web servers for verification with a HTTP challenge or they need control over DNS. This blog post will show a very lightweight alternative using OCI Load Balancer, OCI Object Storage as well as the OCI Certificate Service.
Basic setup in OCI
First of all you have to create a new OCI Object Storage bucket (let's name it "acme") and make it "publicly" visible. Into this bucket, we put a dummy file acmetoken.txt:
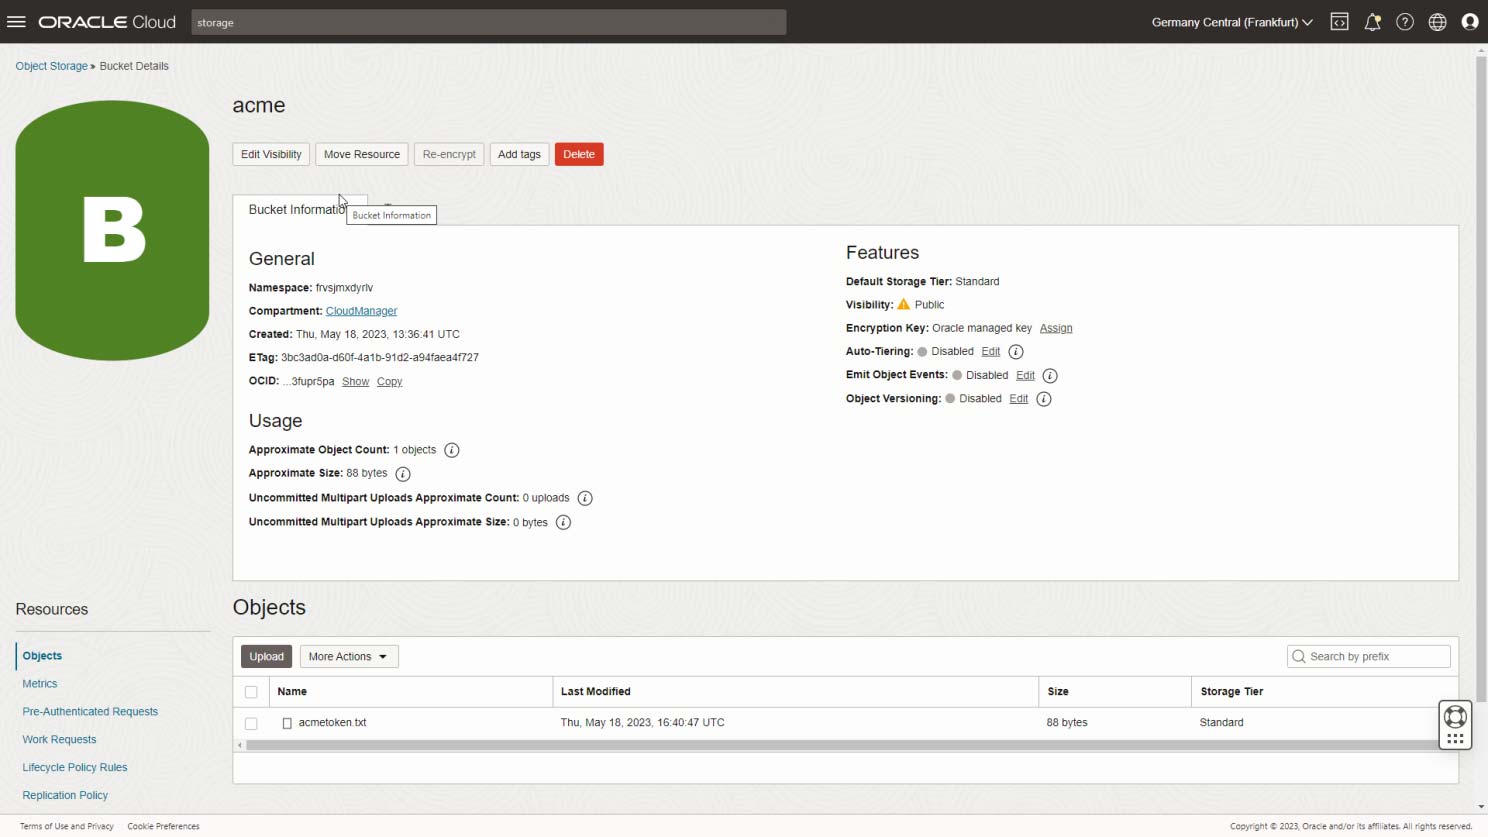
Public Object Storage Bucket with dummy file
Note down the Object Storage namespace which is part of the URL of the file.
Then, we create an empty "rule set" (we name it acme) in the Load Balancer that we want to generate SSL certificates for:
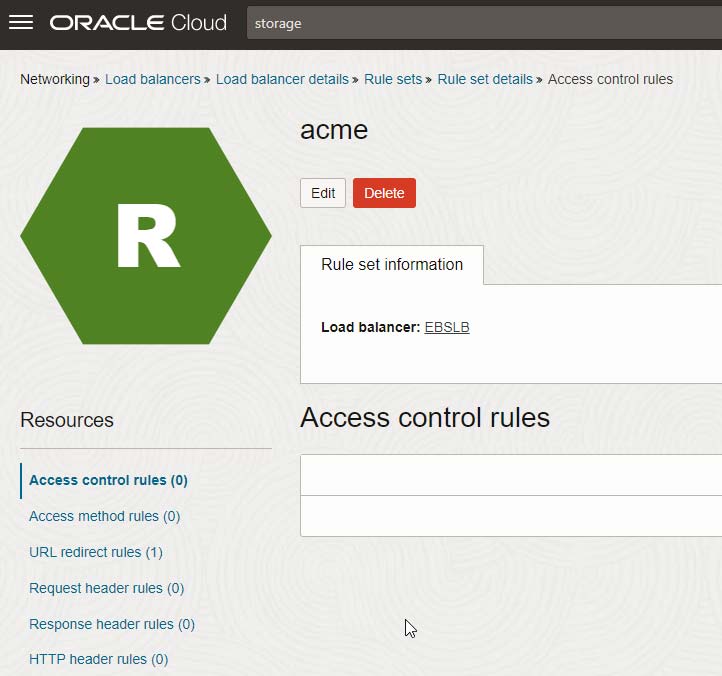
OCI Load Balancer Rule set "acme"
We then have to assign that rule set to a listener (an existing one or a new one, if you use exclusively HTTPS for regular traffic as I do in the following case):
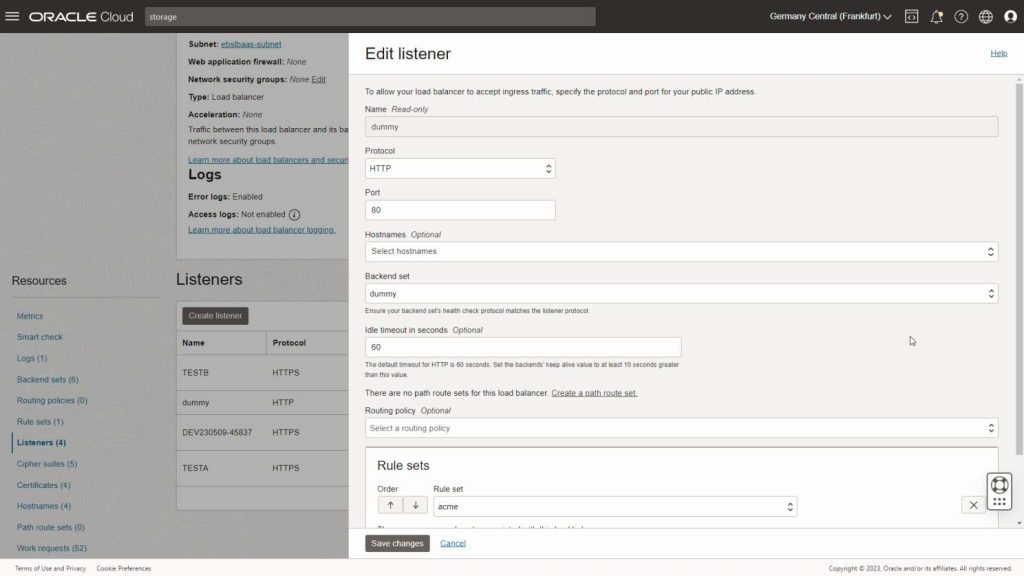
Dummy listener on Port 80 that is used only for SSL certificate generation
Note that it is NOT necessary to have a dedicated listener for that, since we will later only "intercept" the ACME challenge you can easily add it to an existing (HTTP) listener.
If you do not allow regular public internet traffic to port 80 (as I do in this case), you need to create a special security list "letsencrypt" and assign it to the Load Balancer subnet:
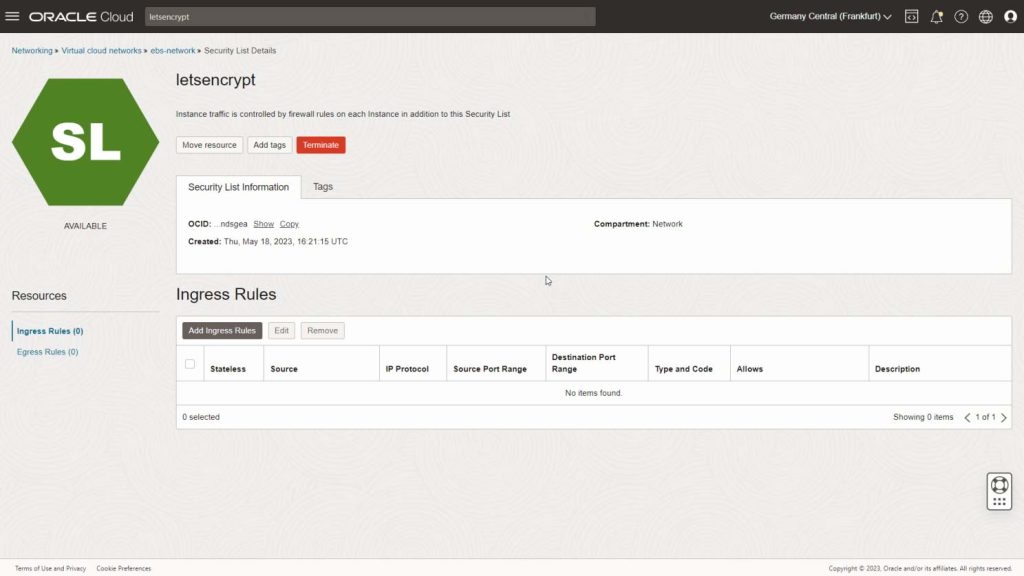
(Usually) empty security list to be assigned to the Load Balancer subnet
Note down the OCIDs of the Load Balancer, the security list as well as the compartment where you want to store the certificates.
Install certbot
You need to run certbot on an instance where you have OCI Command Line tools as well as a recent python3. I in my case use the E-Business Suite Cloud Manager VM for that purpose.
There, install certbot into a virtual environment as follows:
python3 -m venv /u01/install/APPS/certbot
/u01/install/APPS/certbot/bin/pip install --upgrade pip
/u01/install/APPS/certbot/bin/pip install certbot certbot
mkdir /u01/install/APPS/certbot/log
mkdir /u01/install/APPS/certbot/config
mkdir /u01/install/APPS/certbot/work
Create scripts for OCI interaction
Furthermore, create a oci-authenticator.sh in that folder (enter OCID_LB and OCID_SECLIST of your case):
#!/bin/bash
CONFIG_FILE=/u01/install/APPS/.oci/johannes.michler@promatis.de
OCID_LB=ocid1.loadbalancer.oc1.eu-frankfurt-1.XXXXX
OCID_SECLIST=ocid1.securitylist.oc1.eu-frankfurt-1.YYYYY
echo CERTBOT_TOKEN $CERTBOT_TOKEN
echo CERTBOT_VALIDATION $CERTBOT_VALIDATION
oci --config-file $CONFIG_FILE network security-list update --security-list-id $OCID_SECLIST --ingress-security-rules '[{"description": "temporaryLetsEncrypt","icmp-options": null,"is-stateless": false,"protocol": "6","source": "0.0.0.0/0","source-type": "CIDR_BLOCK","tcp-options": {"destination-port-range": {"max": 80,"min": 80},"source-port-range": null},"udp-options": null}]' --force --wait-for-state AVAILABLE
echo $CERTBOT_VALIDATION > acmetoken.txt
oci --config-file $CONFIG_FILE os object put --bucket-name acme --file acmetoken.txt --force
ACME_JSON=$(sed "s/THIS_IS_THE_CHALLENGE/${CERTBOT_TOKEN}/g" acme.json)
oci --config-file $CONFIG_FILE lb rule-set update --load-balancer-id $OCID_LB --rule-set-name acme --force --items "$ACME_JSON" --wait-for-state SUCCEEDED
wget -q -O - >http://${CERTBOT_DOMAIN}/.well-known/acme-challenge/${CERTBOT_TOKEN}
You can skip the first oci command if it is not necessary to open the network security-list.
And an acme.json as follows, where you have to replace
[
      {
        "action": "REDIRECT",
        "conditions": [
          {
            "attribute-name": "PATH",
            "attribute-value": "/.well-known/acme-challenge/THIS_IS_THE_CHALLENGE",
            "operator": "EXACT_MATCH"
          }
        ],
        "redirect-uri": {
          "host": "objectstorage.eu-frankfurt-1.oraclecloud.com",
          "path": "/n//b/acme/o/acmetoken.txt",
          "port": 443,
          "protocol": "https",
          "query": ""
        },
        "response-code": 302
      }
]
Create an oci-deploy.sh (fill in the COMPARTMENT_ID)
#!/bin/bash
echo RENEWED_DOMAINS $RENEWED_DOMAINS
echo RENEWED_LINEAGE $RENEWED_LINEAGE
COMPARTMENT_ID=ocid1.compartment.oc1..ZZZZZZ
CONFIG_FILE=/u01/install/APPS/.oci/johannes.michler@promatis.de
OCI_CERT_OCID=$(oci --config-file $CONFIG_FILE certs-mgmt certificate list --all --compartment-id $COMPARTMENT_ID --query "data.items[?subject.\"common-name\"=='${RENEWED_DOMAINS}'].id|join(',',@)"| tr -d '\""')
echo OCI_CERT_OCID $OCI_CERT_OCID
CERT_PATH=$(cat $RENEWED_LINEAGE/cert.pem)
CERT_CHAIN=$(cat $RENEWED_LINEAGE/chain.pem)
CERT_KEY=$(cat $RENEWED_LINEAGE/privkey.pem)
oci --config-file $CONFIG_FILE certs-mgmt certificate update-certificate-by-importing-config-details --certificate-id=$OCI_CERT_OCID --cert-chain-pem="$CERT_CHAIN" --certificate-pem="$CERT_PATH" --private-key-pem="$CERT_KEY"
And finally, oci-closefirewall.sh (only if you need to open port 80; fill OCID of security list again):
#!/bin/bash
CONFIG_FILE=/u01/install/APPS/.oci/johannes.michler@promatis.de
OCID_SECLIST=ocid1.securitylist.oc1.eu-frankfurt-1.YYYYY
oci --config-file $CONFIG_FILE network security-list update --security-list-id $OCID_SECLIST --ingress-security-rules '[]' --force --wait-for-state AVAILABLE
Then, give execution privs to the user:
chmod 755 /u01/install/APPS/certbot/oci-authenticator.sh
chmod 755 /u01/install/APPS/certbot/oci-closefirewall.sh
chmod 755 /u01/install/APPS/certbot/oci-deploy.sh
Create Certificate
With those preparations completed, we can now request a first certificate:
/u01/install/APPS/certbot/bin/certbot certonly \
--manual --preferred-challenges=http \
--manual-auth-hook /u01/install/APPS/certbot/oci-authenticator.sh \
--manual-cleanup-hook /u01/install/APPS/certbot/oci-closefirewall.sh \
--logs-dir /u01/install/APPS/certbot/log \
--config-dir /u01/install/APPS/certbot/config \
--work-dir /u01/install/APPS/certbot/work \
-d XXXX_MYDOMAINNAME
This should, after some questions, give a result as follows:
Successfully received certificate
Certificate is saved at: /u01/install/APPS/certbot/config/live/XXXX_MYDOMAINNAME/fullchain.pem
Key is saved at:         /u01/install/APPS/certbot/config/live/XXXX_MYDOMAINNAME/privkey.pem
This certificate expires on 2023-08-16.
These files will be updated when the certificate renews..
Install Certificate into Certificate Management Service
Got to the OCI Certificate Management Service and create a new "Imported" certificate testaebsapp.
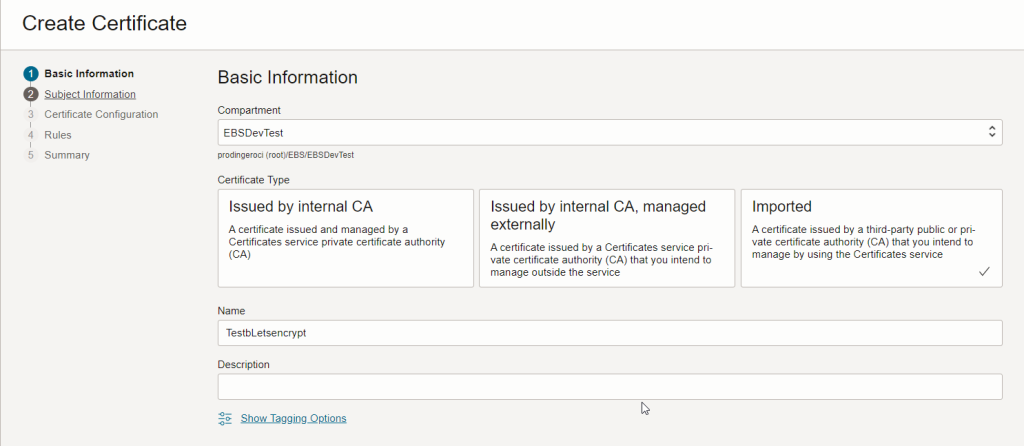
Letsencrypt Certificate Service
In Step 3 upload cert.pem, chain.pem and privkey.pem created in the previous step. Finally, you can use the certificate uploaded in the OCI Load Balancer and receive a properly signed SSL certificate.
Renew Certificates automatically
Let's encrypt certificates have a rather short lifetime. Luckily, the above process including the renewal of the certificate in the OCI Certificate Service can be easily automated with the following command:
/u01/install/APPS/certbot/bin/certbot renew \
--manual --preferred-challenges=http \
--manual-auth-hook /u01/install/APPS/certbot/oci-authenticator.sh \
--manual-cleanup-hook /u01/install/APPS/certbot/oci-closefirewall.sh \
--logs-dir /u01/install/APPS/certbot/log -\
-config-dir /u01/install/APPS/certbot/config \
--work-dir /u01/install/APPS/certbot/work \
--deploy-hook /u01/install/APPS/certbot/oci-deploy.sh
To test if everything is working, a renewal can be enforced by adding --force-renewal.
Summary
The above procedure shows a very lightweight approach on how SSL certificates from letsencrypt can be created for use in OCI (e.g. Load Balancer) services.
The approach described can also be used if you technically use the certificates for services that rely on internal hostnames and have a private IP assigned for XXXX_MYDOMAINNAME in the internal DNS server - as long as you assign a public IP in the public DNS for Let's Encrypt purposes. If you don't like this, I suggest you look into certbot-dns-oci.


